

4 Tips for Working with Your Incentive Travel Photographer
Don’t forget to come home with the pictures you need to share with attendees and to market the incentive travel program in the future. Check out these tips to help ensure you get what you need from your photographer.

Incentive Travel Trip to Florence - Ponte de Vecchio
When it comes to organizing an incentive trip, there are tons of moving parts. From site visits to menus and all of the logistics of moving people around…there’s so much to manage. Of course, all of the hard work you do needs to be captured to preserve memories and create visual content that can be used for marketing and promotion.
So many logistics and planning needed for incentive travel programs
One consideration that might not be top-of-mind is having a plan for maximum photo/video coverage of the activities and special photos that you must have from the trip.
Most of the time, attendees can be headed in different directions each day to participate in exciting and interesting activities. So getting quality photo coverage of as many important activities as possible takes a little planning.
Here are 4 tips and things to think about when working with your photographer to capture as much as possible during your incentive travel program.
1. The Plan: During the planning stages, the agenda for incentive travel programs is usually fluid. But once the activities have been locked in, a great way to maximize photo coverage is to have a pre-program meeting between the photographer, the key travel director who’s handling activities and the DMC (destination management company). That way, the photographer and the DMC can map out the coverage plan based on locations, timing and transportation.

Map out the activities - look at distance between locations, who will be on the excursions and the timing of each activity
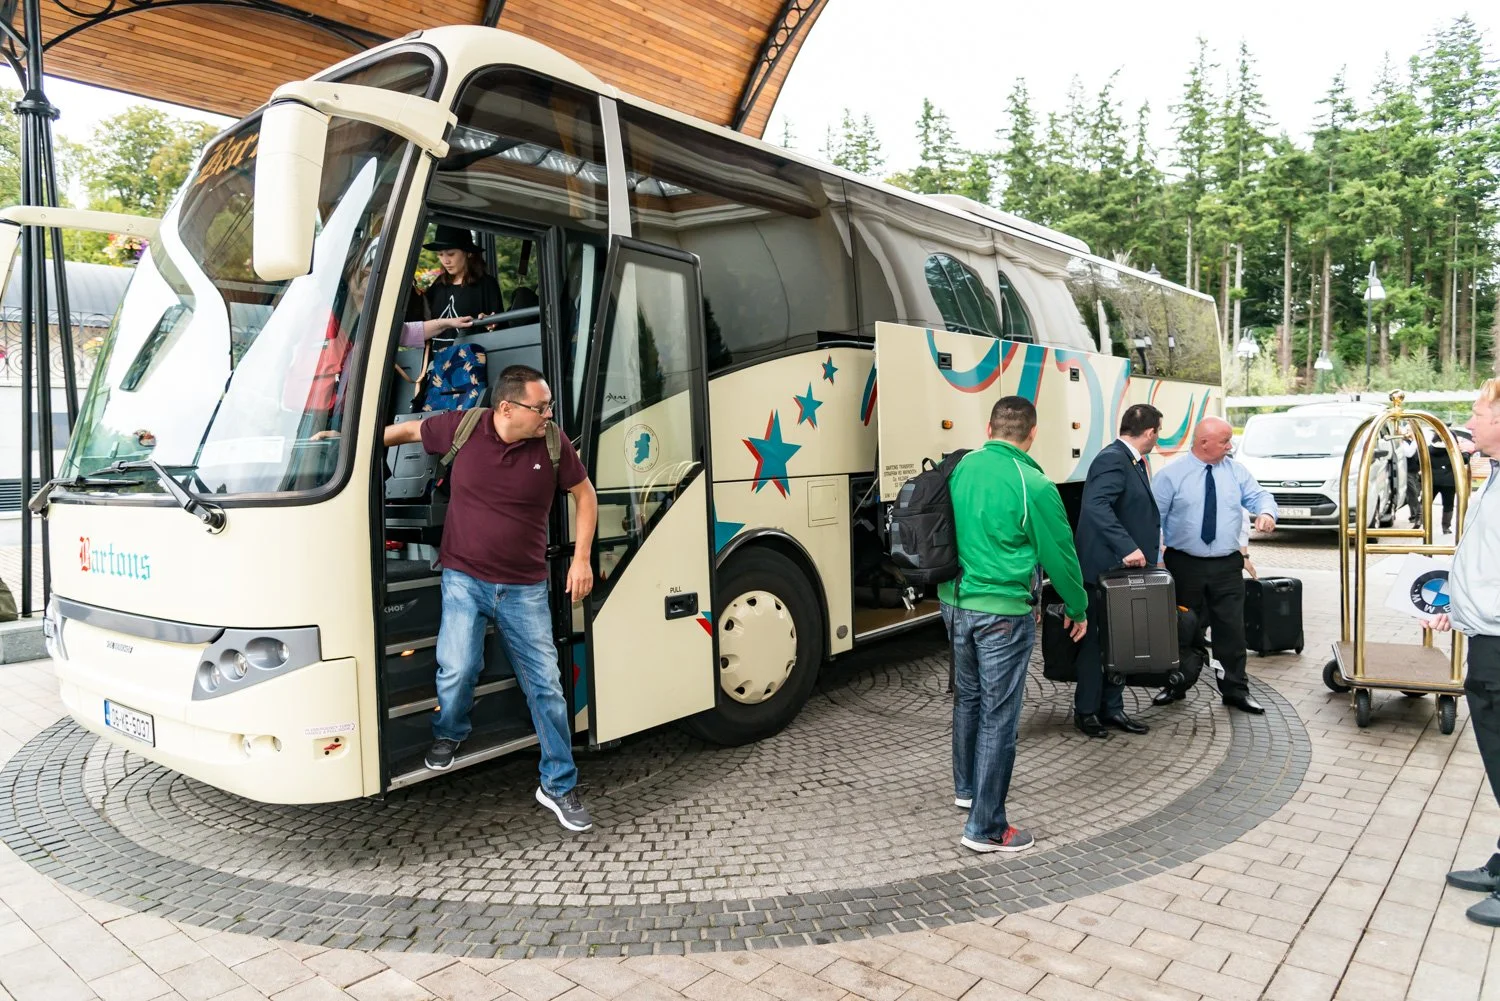
2. Transportation: Talking with the DMC ahead of time can also help determine if the photographer will need a dedicated car or can ride with the group to activities. A rental car provides the most flexibility, especially if they need to cover more than one activity per day and can’t wait for the group. However, if your incentive trip is taking place somewhere that might be more challenging to navigate (like Ireland where they drive on the left side of the road or Naples where the traffic requires a local to navigate), a local car service might be the best option.
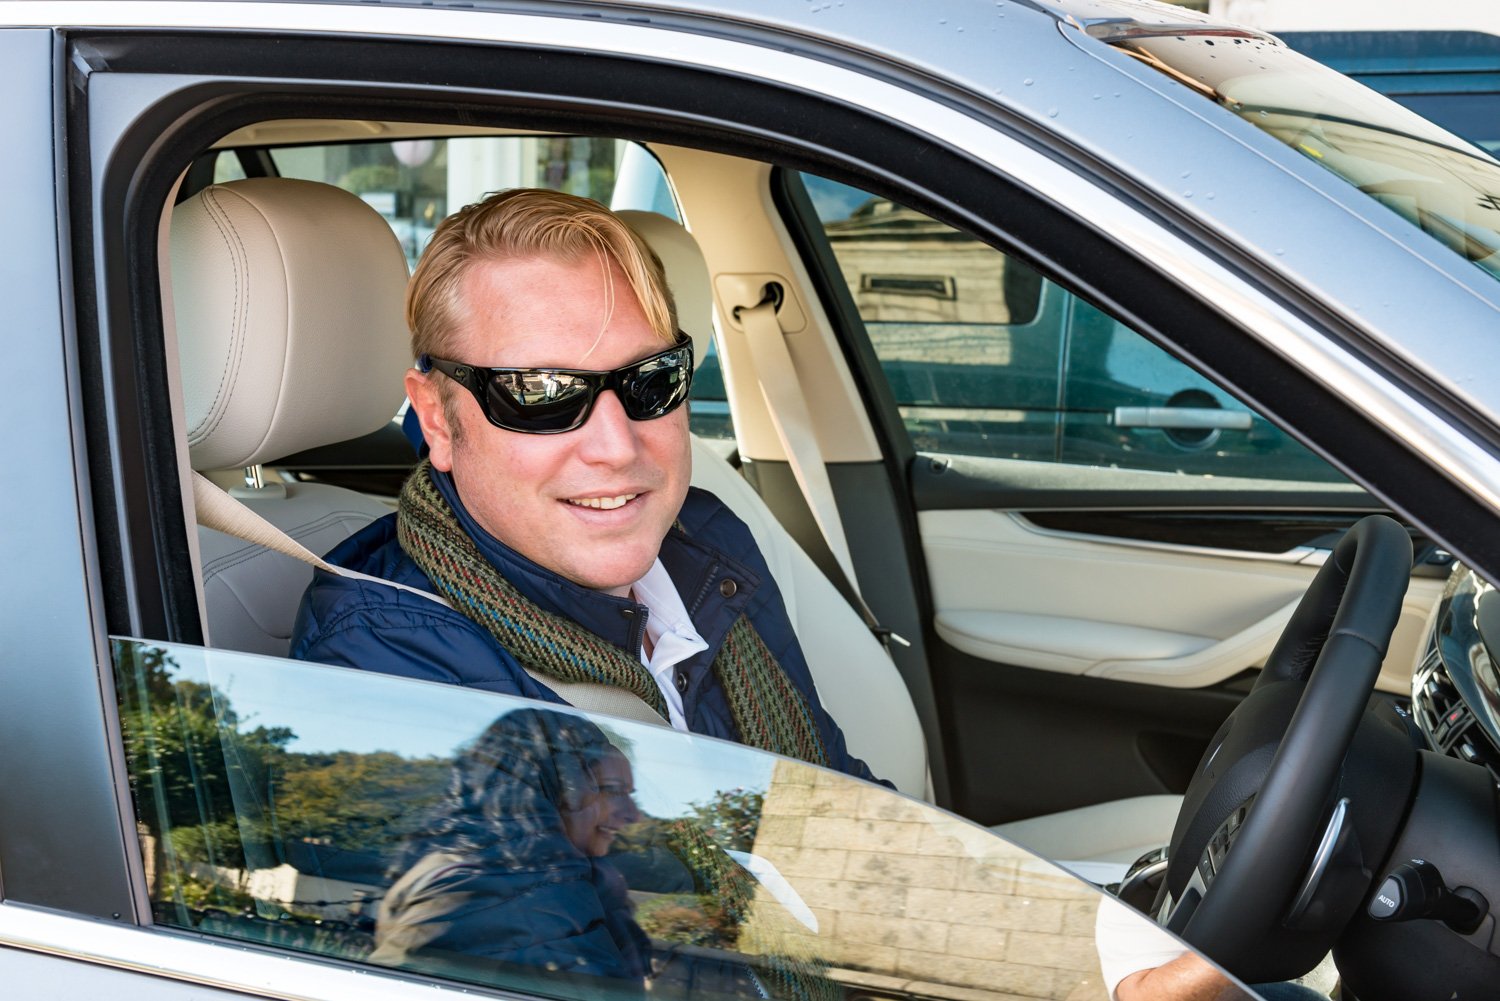
Left-side driving

Challenging roads
3. In the Action: Getting great shots of the attendees during activities usually means your photographer needs to be in the middle of the action.
Let’s say your group is headed out on a snorkeling trip off the coast of Maui in Hawaii. Consider sending your photographer along on the excursion. Otherwise, the only photos you’ll get is of people getting on the boat and waving goodbye.

One option…the photographer stays behind on the dock catching attendees waving goodbye as the boat pulls away

A better option…the photographer joins attendees in the middle of the action to get great shots of the excursions.
The same goes for snowmobiling on a glacier in Iceland or even just being onsite for the group’s cooking class in Tuscany.

Snowmobiling on a glacier in Iceland

Cooking class in Tuscany
But most of the time, you’ll need to reserve a spot with the DMC so there’s a guaranteed space for the photographer to be close to the action or in some cases even participate in the activity (to some degree) and capture authentic and memorable moments throughout the excursion.
For a bonus, the best shots might come from a photographer who can be in the water with the right gear to capture some underwater shots of the group. Aerial/drone shots will also give a great and unusual perspective that your guests aren’t likely to get on their cell phones…something to consider when hiring an incentive travel photographer.

Snorkeling photos from the water instead of from the dock

Group photo from a drone of snowmobiling excursion in Iceland

Aerial and drone photos of snorkeling in Hawaii takes incentive travel photos to the next level

Drone photos add an exciting and unusual dimension to incentive travel photos
4. Special Shots: Talk with your photographer well-before the trip about special photos you’d like to have during the trip. Different gear might be needed depending on the circumstances. A travel photographer needs to balance the amount of gear they bring on a trip with the needs of the group. Different needs can mean different gear - not all cameras are created equal.
For example, if you have a group of 250 people and want a group photo, the photographer might need to bring extra lighting equipment or camera lenses that might not otherwise be needed. So it’s important that you discuss these types of shots ahead of time so the photographer can determine the type of gear needed and how it will get to the site.
As a professional, your photographer should be able to offer suggestions on achieving your vision for special photos that might even save money and make it a good experience for the attendees.

Pre-planning with your photographer can make large group photos and other special shots go more smoothly and help you achieve your vision
By following these tips, you can effectively schedule a photographer to cover the activities of your incentive trip and create beautiful, professional-grade images that will help you remember and promote the experience for years to come.

In the action: Get great action shots by including your photographer on excursions

Turtle under water seen on an incentive trip snorkeling trip in Maui

2021 Holiday Gear
Don’t miss these great tech deals!
There are great prices on tech at the end of the year. Below are some deals that I’ve seen. I use (or would like to use) most of this gear myself.


Video Conferencing Lights for Zoom or Teams or WebEx
Zoom calls don’t seem to be going away anytime soon. So if you want to up your game, add some lighting for those video calls.
Lume Cube has a nice solution with a 2-light set that attaches to your desk. The round fixtures are a nice touch. You can get it as a 1-light kit or a 2-light kit. With 2 lights, you can create some interesting dimension on your face.
There are a few other things you can do to improve your look on video calls. I listed a few here.
Apple Gear
Yes, Apple gear can seem more expensive. Many feel that they’re paying for the brand. But in my experience, I get a lot out of Apple equipment. Their computers are built well and last a long time. You get what you pay for.

DJI Drones
Drones come in all sizes and prices now. They’re a lot of fun to fly. So if you want to try it out or if you’re more serious, there’s a drone for you.
The latest Mavic from DJI looks amazing (Mavic 3). There are still some functions that are coming in a future firmware upgrade, but the drone is available now!

How to Change the Background for a Teams Meeting
How to change the background for a Microsoft Teams meeting. It’s a little different than for a zoom meeting.
Changing the background for a video call can help add personality to a call or hide your personal space. Teams, like the other popular video call apps let’s you either blur your background or add an image as your background.
However, unlike a Zoom meeting, you must first be in a call or about to enter a call in order to change the background for your Teams meeting. You can’t (currently) change the background in the general settings.
Here’s how to do it…
Steps to Change your Teams Background
First, when you’re about to enter a Teams meeting, you’ll see this screen. Before clicking or tapping on Join now, click Background filters under your video window.
Be sure Video is turned on. Look for the toggle switch to the left of the Background filters setting to turn on the video.
Select Background filters
Next, select the background from the Background Settings that you want to apply. You can also just let Teams blur the background instead. Note that this does’t guarantee that sensitive information will be completely hidden.

Background settings shows the different backgrounds you can load, including Blur, applied here.
Once you’re happy with your choice, click Join now to join your call with the new background applied.
Pro Tip

On a side note, a pop up green or blue screen can help create a better background replacement.
Personally, I prefer this pop up style over the less expensive hanging green screens. They’re much easier to put up and take down and don’t have wrinkles.
What if you’re already in a call?
You can still change the background, no problem. Click the three dot menu at the top of your call screen to open the settings.

From the Settings menu, select Apply background effects to open the same background options.

Pro Tip

Good lighting is one of the most important things you can add to take your video call up a few notches. This light from Lume Cube is a great combination of function & price. Look more professional and sharp with this simple fix.
Now pick the background you want to use. Tap Preview to see how it will look before going live. Then tap Apply when you’re ready to make that background live for all to see.
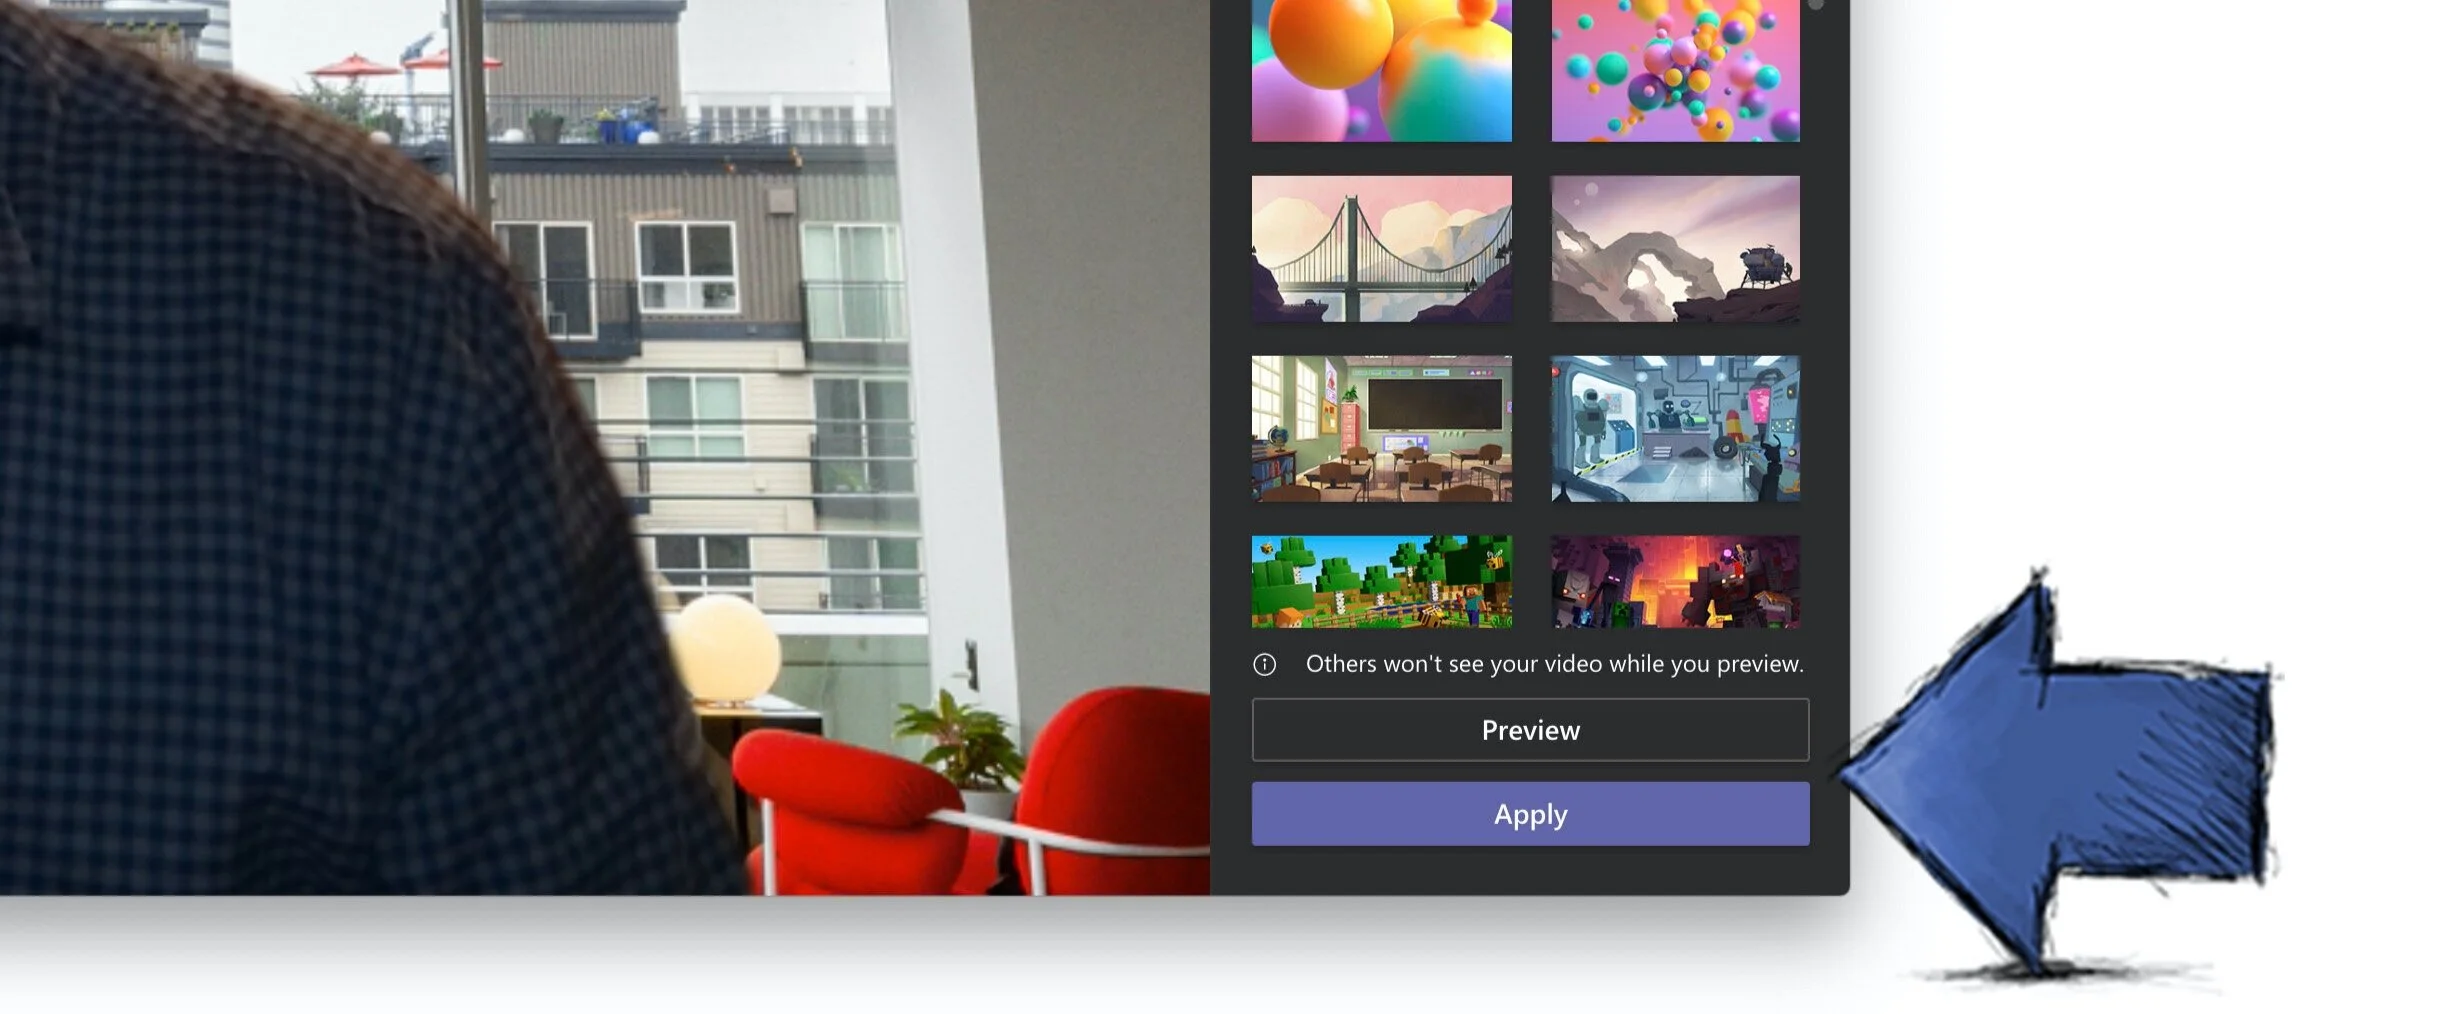
Select a new background a tap Apply
Upload your Own Background in Teams
You can also add your own background image to Teams. While you have the Background settings open, tap the + Add new link. Find a picture file on your computer and add it to the backgrounds. Then just select the new image and tap Apply.
For image size, I recommend 1920x1080 px.

Here are some other tools that improve your video calls.
Laptop stand for zoom or Teams calls(raises the camera so viewers see you eye-to-eye). More options here.
Ring Light Tripod Kit or Ring Light w/ Stand
Read more tips for looking better on video calls in this blog post.

Tips for Looking Better On Video Calls - FaceTime, zoom, Skype, Teams
Now that we’re using video conferencing more and more, here are some tips to look better and stand out when you’re “on camera”.
You might be comfortable with your laptop…well, on your lap. But it’s not the best place for a video call. When your laptop is on your lap or even on your desk, it usually means you’re looking down at the camera, which means that your viewers are looking up at you from below. That’s not a great angle, not flattering and gives the appearance that you’re looking into a hole.
But the good news is that it’s not too hard to make it better.

TIP 1: Eye-Level
The best thing you can do is to get that camera higher. You want to have the camera at eye-level or even slightly higher than eye-level. I don’t recommend holding your laptop up in the air. Strong as you may be, you won’t last too long like that. Probably the quickest thing you can do is grab some books (if you still have books) and stack them up so that your laptop can rest with the camera at eye-level. Other things around your home might work too…a box, a kitchen-container (upside down). Whatever you choose, be sure it’s wide enough and stable for your laptop.
To take it up a notch and have a more stable platform, I use an adjustable laptop stand (Amazon) like the one shown here. This has two important benefits. First, it raises your laptop so that the camera is at eye-level. Second, and maybe even more important, it improves your posture when sitting at a desk.

I recommend an adjustable stand so that you can set it to the height that fits you best. You can use this link for a full search on Amazon.
You’ll see that a stand like this also raises the keyboard, which might make it uncomfortable for typing. You could limit your use of the stand to your video calls since your attention is sure to be glued to the screen without distraction or a need for typing (right?). But if you like the idea of elevating your laptop, the next gadgets that make this a great set up are a wireless mouse and keyboard (Amazon).
TIP 2 - Composition
After shooting a ton of headshots, I can tell you that composition makes a huge difference when you’re on a video conference (and in headshots too). Try to position the camera so that your head is towards the top of the screen.

Bad composition

Good composition
TIP 3 - Lighting
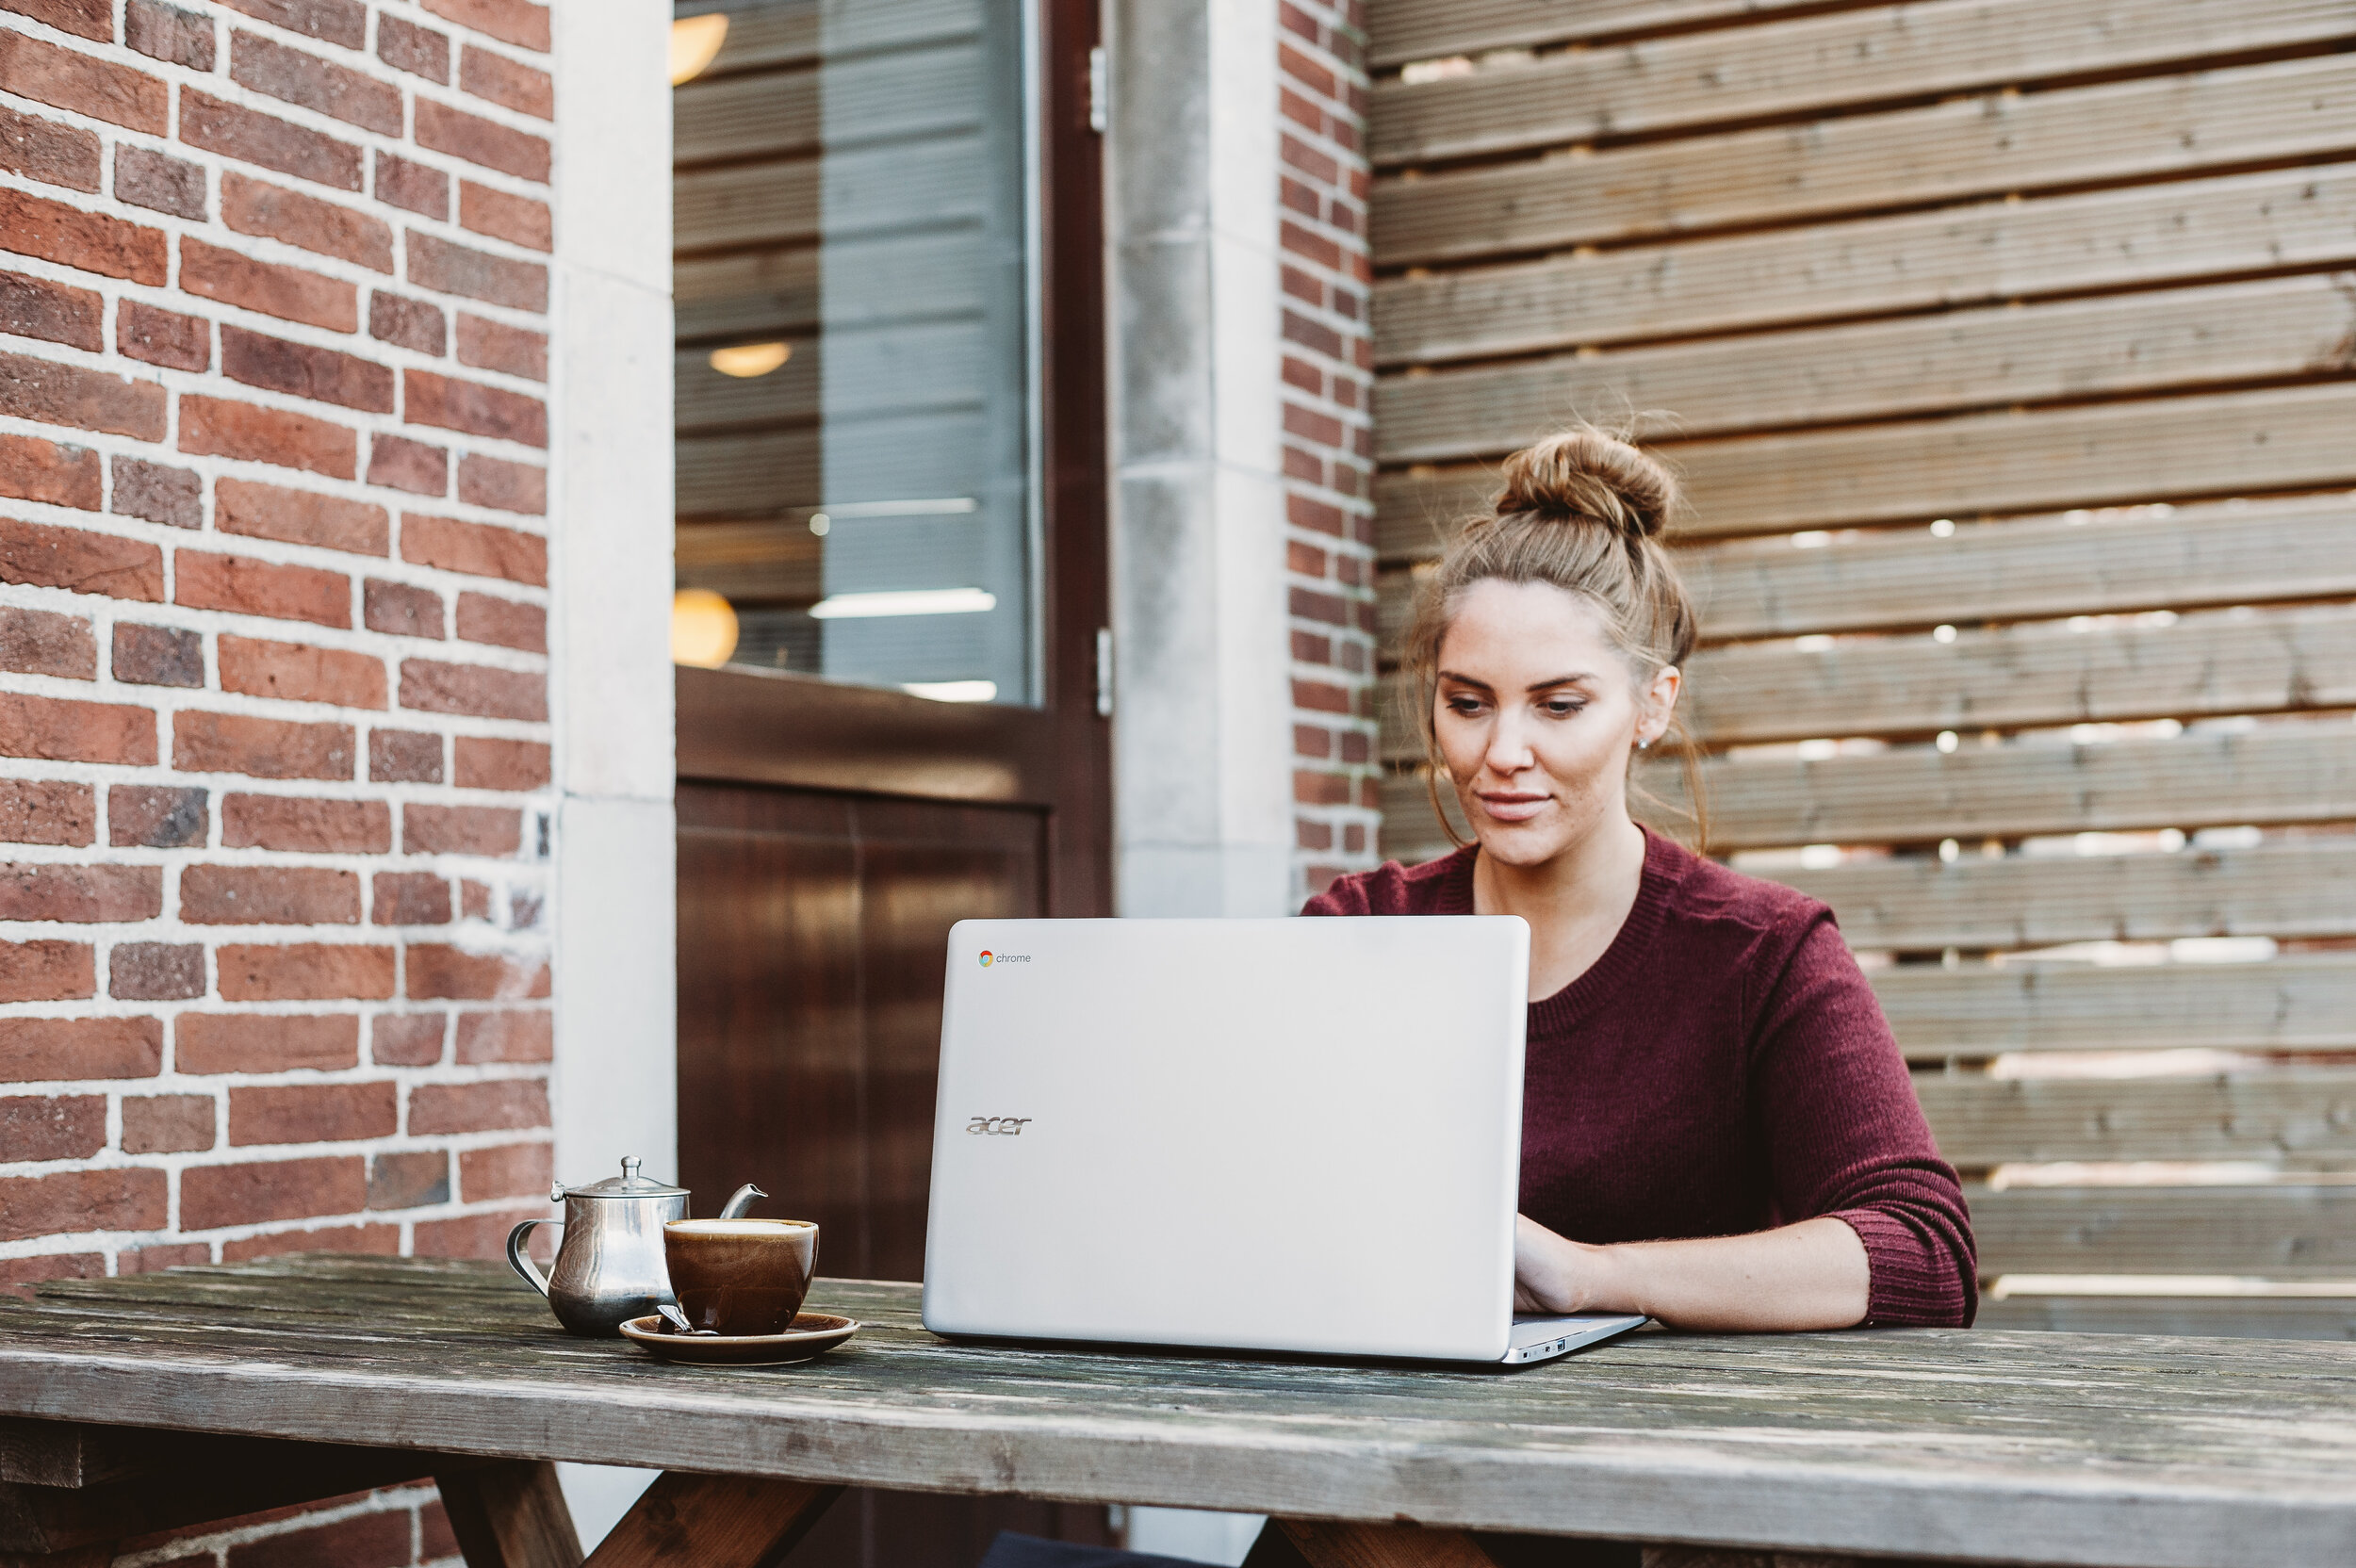
Lighting is SOOO important. If you can, sit in front of a nice light source, which could be a window. Try to face the window so that it’s not on one side of your face and definitely NOT behind you. With the light behind you, your face will go dark, like a silhouette.

The most flattering light is when the light is in front of you and a little above if possible.
If you don’t have a window, you can use a lamp or you can purchase an inexpensive video light.

This is an example that can also be used with your mobile phone: Yongnuo LED Ring Light (B&H). And here’s a popular option on Amazon that is USB powered so you can plug it into your laptop. Ring Light Tripod Kit or Ring Light w/ Stand (Amazon).
There’s also a new light that you can fix to your laptop with a suction cup. It’s from Lumecube. They make small lights for video and photography. Check it out here: Lume Cube Air VC (B&H) or directly from Lume Cube here.
Here’s another inexpensive option: Bescor LED Light Kit (B&H).
Some options are in high demand, as you can imagine.
TIP 4 - Background
Try to keep the space behind you clean and neat. Clutter makes your background less appealing. You can also dress up the background with a plant or an interesting antique. But just one or two items is enough.
If you’re using zoom, you can try out the fake background effect. Go to Settings/Preferences and select Virtual Background. There you can choose from a few provided backgrounds like the Golden Gate Bridge or you can upload your own photo. Maybe one from a vacation. Try to pick a photo without too much going on.
You can also try out the green screen option if you happen to have a green screen lying around. No? Actually, using a green screen is easier than you might think and is especially good if you’re in tight space or in one that you’d prefer to keep private. Here’s a pop-up screen (Amazon) that actually hooks onto your chair and folds down nicely for storage.

Here’s another pop-up option that’s green on one side and blue on the other. You’ll probably want a stand so you can place it where you like.


This is my favorite background stand by Lastolite (B&H).

Once you have your green screen in place, your virtual background will look so much better and you can keep what’s behind you to yourself. Don’t forget to switch on the setting for green screen in zoom.
Bonus Tip - External Microphone
Most of us don’t have a recording studio in our home, which means you could get a lot of echo on your audio. That can make it hard for others to hear and understand you.
An easy fix is to use the earpiece with the microphone that comes with your mobile phone. Or you could use a Bluetooth headset.
Having the mic closer to your mouth will improve your audio and cut out some of the echo.
If you don’t have something already, here are some suggestions:
Here’s a Microsoft over-ear headset with a noise-canceling microphone (B&H)
Here’s a comfortable over-ear headset (B&H) that can plug into your computer’s USB port.
I hope these tips help. Feel free to get in touch if you have questions about these tips or if you’d like to take it up a few notches with even better lighting, camera and microphone options like the gear we use for creating videos for business.

Keyboard Shortcuts for Zoom Online Conferencing
Here are some keyboard shortcuts to try on your next Zoom meeting.
Working from home a lot more means a lot more online meetings. Zoom is one of the more popular platforms for online meetings (no affiliation to us…just coincidence). Since many of us are using Zoom for online meetings, I thought it might be helpful to share some shortcuts.
Check them out below.
And let me know if you are using a different app like Teams or Skype.
Hope it helps!
Keyboard Shortcuts and Hot Keys
Mute/unmute your audio: One of my favorites, especially if the dog is barking.
Win: Alt+A
Mac: Command(⌘)+Shift+A
Mute/unmute everyone’s audio: Sometimes someone on the call is busy typing or their dog is barking. If you’re the host, you can quiet things down.
Mute everyone (except for the host).
Win: Alt+M
Mac: Command(⌘)+Control+M
Unmute everyone (except for the host).
Win: Alt+M
Mac: Command(⌘)+Control+U
Push-to-talk: This one is great if you prefer to remain on mute most of the time.
Mac only: Hold the Space key to talk.

Keyboard shortcuts can speed things up.
Start/stop video: Most of us aren’t using video, but the more we work from home, I suspect we might find ourselves on more face-to-face video calls.
Win: Alt+M
Mac: Command(⌘)+Shift+V
Share your screen: If you need to show your screen to others on the call use this command. You can choose between a single window, a specific application or your entire desktop (not recommended for privacy reasons):
Win: Alt+Shift+S
Mac: Command(⌘)+Control+S
Display/hide Participants Panel: Need a reminder of who’s on the call?
Win: Alt+U
Mac: Command(⌘)+U
Display/hide Chat Panel: Similarly, open and close the chat panel:
Win: Alt+H
Mac: Command(⌘)+Shift+H
Full Screen View: Sometimes the meeting takes up your whole screen. Maybe that’s a good thing, reducing distractions. But if you want to switch between full and partial-screen view, you can use this keyboard shortcut.
Win: Alt+F
Mac: Command(⌘)+Shift+F.
The ESC key should also work.
Minimal Window: You could also switch to minimal window size:
Mac only: Command(⌘)+Shift+M
Exit Meeting: Have you been done with a meeting, said goodbye and then you need to find that Exit Meeting button with a little dead air? Use this shortcut to: Prompt to End or Leave Meeting:
Mac only: Command(⌘)+W
For the complete list of keyboard shortcuts, go to Zoom’s help page here:
https://support.zoom.us/hc/en-us/articles/205683899-Hot-Keys-and-Keyboard-Shortcuts-for-Zoom